Set up a Wireguard VPN on Ubuntu and connect from Mac and Android
How to set up a Wireguard server on Ubuntu and set up clients on Mac and Android.
About Wireguard
Wireguard is a relatively new VPN technology that according to the website:
is an extremely simple yet fast and modern VPN that utilizes state-of-the-art cryptography. It aims to be faster, simpler, leaner, and more useful than IPsec, while avoiding the massive headache. It intends to be considerably more performant than OpenVPN.
Bear in mind that Wireguard has not been audited and is still in development, so use it at your own risk.
Let’s set one up and see if it meets expectations!
Set up Wireguard server on Ubuntu
First get hold of a Linux VPS on a cloud provider of your choice. I use an AWS EC2 micro with Ubuntu 18.04. A Digital Ocean droplet would also be a good choice.
When setting up the firewall you will need to add an inbound rule for UDP traffic on port 51820, or whichever port you want to run the Wireguard server on. In AWS you can configure this in the security group when setting up the sever.
Install Wireguard
Once you’re set up and SSH’d into your server, install Wireguard as follows:
-
Install the
software-properties-commonpackage so we can useadd-apt-repository1sudo apt-get install -y software-properties-common -
Install Wireguard
1
2
3
sudo add-apt-repository ppa:wireguard/wireguard sudo apt-get update sudo apt-get install wireguard
Enable IP forwarding
In order to be able to access the internet once connected to the VPN server we need to enable IP forwarding. To enable it immediately run
|
|
And to make this change persist after reboots, edit /etc/sysctl.conf and uncomment the line net.ipv4.ip_forward=1.
Create server config
-
First generate a public/private key pair
1
2
umask 077 wg genkey | tee privatekey | wg pubkey > publickey -
For extra security you can also generate a pre-shared key for each client. This adds an extra layer of symmetric key encryption for post quantum resistance:
1
2
3
wg genpsk > client1 wg genpsk > client2 ... -
Create the file
/etc/wireguard/wg0.confand enter the following contents, replacing the placeholders with the correct values for your setup:1 2 3 4 5 6[Interface] Address = <wireguard_internal_server_ip> PrivateKey = <server_private_key> ListenPort = 51820 PostUp = iptables -A FORWARD -i %i -j ACCEPT; iptables -A FORWARD -o %i -j ACCEPT; iptables -t nat -A POSTROUTING -o ens5 -j MASQUERADE; PostDown = iptables -D FORWARD -i %i -j ACCEPT; iptables -D FORWARD -o %i -j ACCEPT; iptables -t nat -D POSTROUTING -o ens5 -j MASQUERADE;-
<wireguard_internal_server_ip>is a private IP address for the wg0 interface. It’s best to pick one on a different subnet to your LAN. If you’re not sure use10.0.0.1/32. -
<server_private_key>is the private key we generated in step 1. -
If you chose a different port for the Wireguard server then replace
51820with your value. -
In the
PostUpandPostDowncommands replaceens5with the name of the network interface that has access to the internet. Yours may be calledeth0for example. -
The
PostUpgets executed after the Wireguard server is started. The command specified here adds some firewall rules that will allow you to connect to the internet through the VPN server.PostDowngets executed when the Wireguard server is shut down and the command specified here removes the firewall rules created inPostUp.
-
-
If you’re setting up the server behind NAT (e.g. if the server is on your home network behind a router) then you may want to add the additional setting:
7PersistentKeepalive = 25This will send an empty authenticated packet every 25 seconds to keep your firewall or NAT mapping persistent.
-
We will need to add a section to this config file for each client that will connect to the server. First we’ll create the client configs and then return to add these sections.
Set up Wireguard client on Mac
Install and configure client config
-
Install the official Wireguard app from the App store https://itunes.apple.com/us/app/wireguard/id1451685025?mt=12.
-
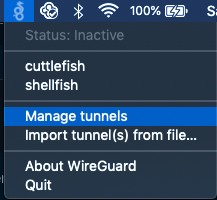
Click on the wireguard tray icon and select ‘Manage Tunnels’
-
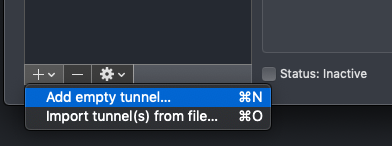
Create a new empty tunnel and enter the following configuration, replacing the tokens with the correct values for your setup:
1 2 3 4 5 6 7 8 9 10[Interface] PrivateKey = <auto_generated> Address = <wireguard_internal_client_ip> DNS = 1.1.1.1 [Peer] PublicKey = <server_public_key> PresharedKey = <client_server_preshared_key> AllowedIPs = 0.0.0.0/0, ::/0 Endpoint = <server_public_ip_address>:51820-
<auto_generated>is a private key automatically generated by the Wireguard app. -
<wireguard_internal_client_ip>is the private IP address for the client’s Wireguard network interface. It should be on the same subnet as<wireguard_internal_server_ip>. If you used10.0.0.1/32for the server put10.0.0.2/32here. -
<server_public_key>is the public key for the server generated in the previous section. -
<client_server_preshared_key>is the optional pre-shared key generated in the previous section. -
<server_public_ip_address>is the public IP address of your server. If you used a different port, change51820to value you used. -
The DNS can be set to any provider you like. Here we’re using Cloudflare’s 1.1.1.1 public DNS.
-
AllowedIPsis the set of IP addresses to redirect down the VPN tunnel. Here we’ve set it to match all IP addresses, i.e. all non local traffic will get sent over the VPN. If you want to configure split tunneling you can adjust this range of IP addresses to suit your setup.
-
Add client to server config
When creating the server config we said we’d need to add some extra configuration for each client. Now that we’ve generated the client config we are ready to add these sections.
-
Open
/etc/wireguard/wg0.confon the Wireguard server and append the following (repeating this block if there are multiple clients):1 2 3 4[Peer] PublicKey = <client_public_key> PresharedKey = <client_server_preshared_key> AllowedIPs = <wireguard_internal_client_ip>-
<client_public_key>is the client’s public key. -
<client_server_preshared_key>is the optional pre-shared key for this client. -
<wireguard_internal_client_ip>is the private IP address for the client’s wireguard network interface. If you used10.0.0.2/32in the previous section then enter that here.
-
-
Save and close the config file.
Start up Wireguard
Now that everything is configured it’s time to start all the applications.
Start the server
-
On the server run
1sudo wg-quick up wg0To verify that everything has started run
1sudo wg showYou should see a print out of the server interface and configured clients.
-
To start Wireguard automatically on startup enable the service
1sudo systemctl enable wg-quick@wg0
Connect from the client
In the Wireguard app select your tunnel in the list and check the box next to ‘Status Inactive’. If all is well you should see the status change to ‘Active’ and some information about when the last successful handshake was.

Set up an Android client
Install the Wireguard app from the app store https://play.google.com/store/apps/details?id=com.wireguard.android.
There are a number of ways to set up the client config. You can either create a config within the app and set up the server in the same way as setting up the Mac client, or you can create the client config on you server/mac and generate a QR code to scan it in.
To generate a QR code you’ll need to install qrencode. On Linux run:
|
|
On Mac:
|
|
To generate the QR code from a config called mobile.conf run
|
|
This will print out a QR code in the terminal which you can scan in.